
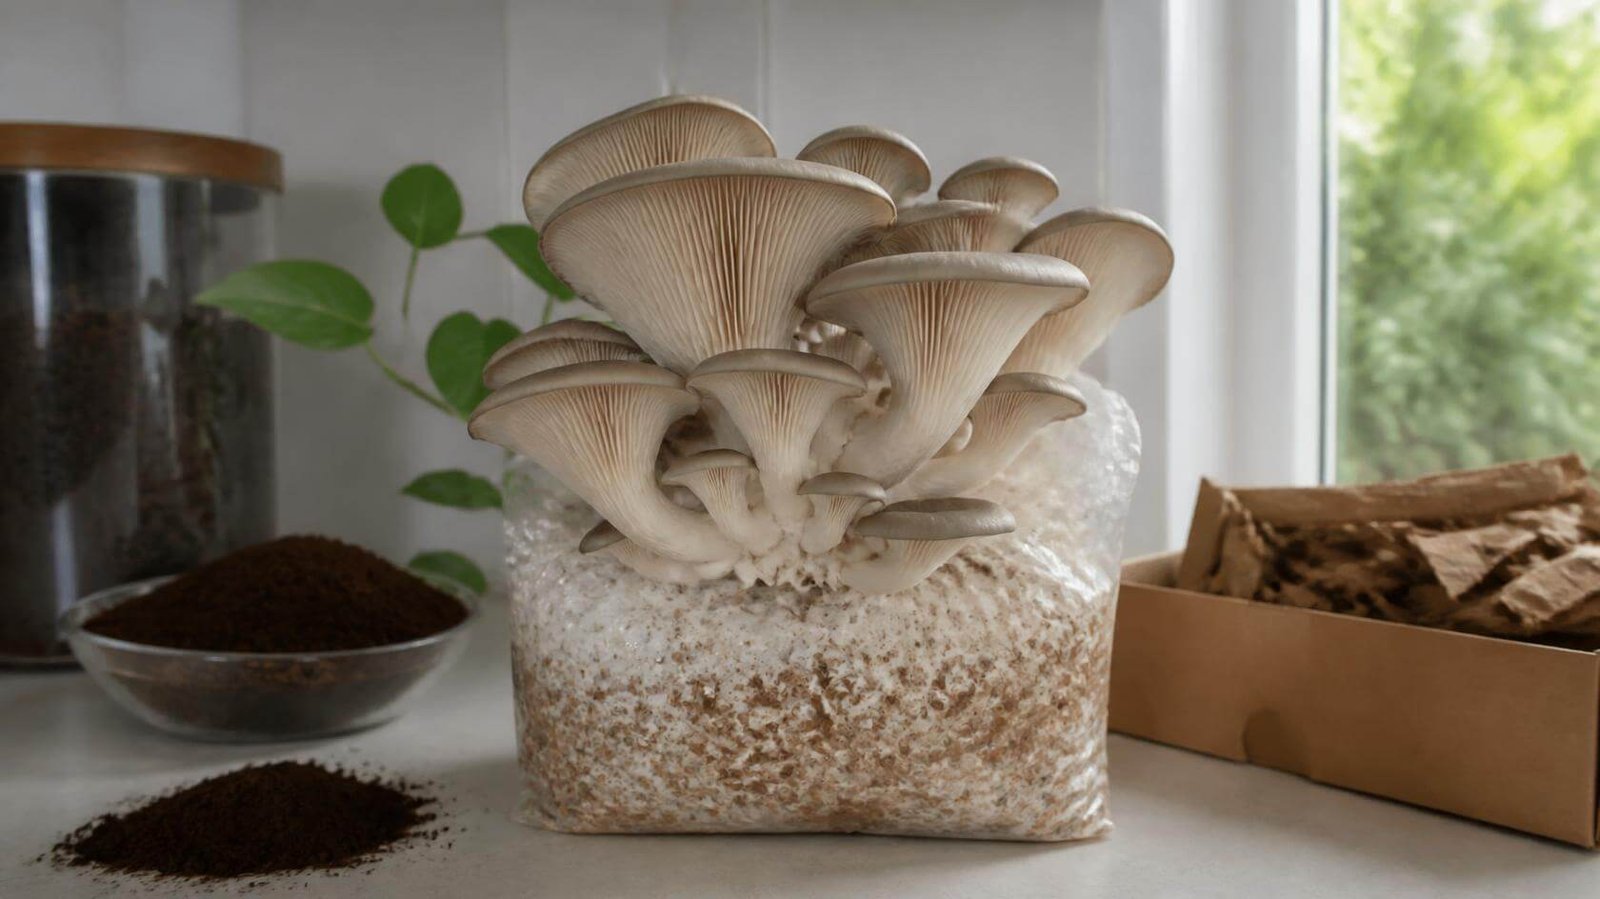
If you have ever thrown away used coffee grounds and thought, “This feels like a waste,” you are not alone. A lot of home growers use coffee grounds, cardboard, and a little oyster mushroom spawn to turn kitchen waste into fresh edible mushrooms.
Quick Answer : To grow oyster mushrooms, mix fresh used coffee grounds with clean soaked cardboard in a 2:1 ratio, add oyster mushroom spawn, place the mix in a clean bag or container, keep it warm and dark (65–75°F) for 10–21 days while the mycelium grows, then move it to indirect light and fresh air when pins appear. Harvest when the caps flatten but before the edges curl upward.
Quick Facts
- Scientific Name : Pleurotus ostreatus (Pearl Oyster), Pleurotus columbinus (Blue Oyster), Pleurotus djamor (Pink Oyster)
- Best DIY Substrate : Used coffee grounds (2 parts) + soaked plain brown cardboard (1 part)
- Ideal Temperature : 60–75°F (warm, dark room during incubation)
- Time to Harvest : 2–4 weeks from mixing spawn to first harvest
- Difficulty Level : Beginner-friendly (low-cost DIY home cultivation)
- Expected Yield : 1–3 flushes (harvest rounds) per container
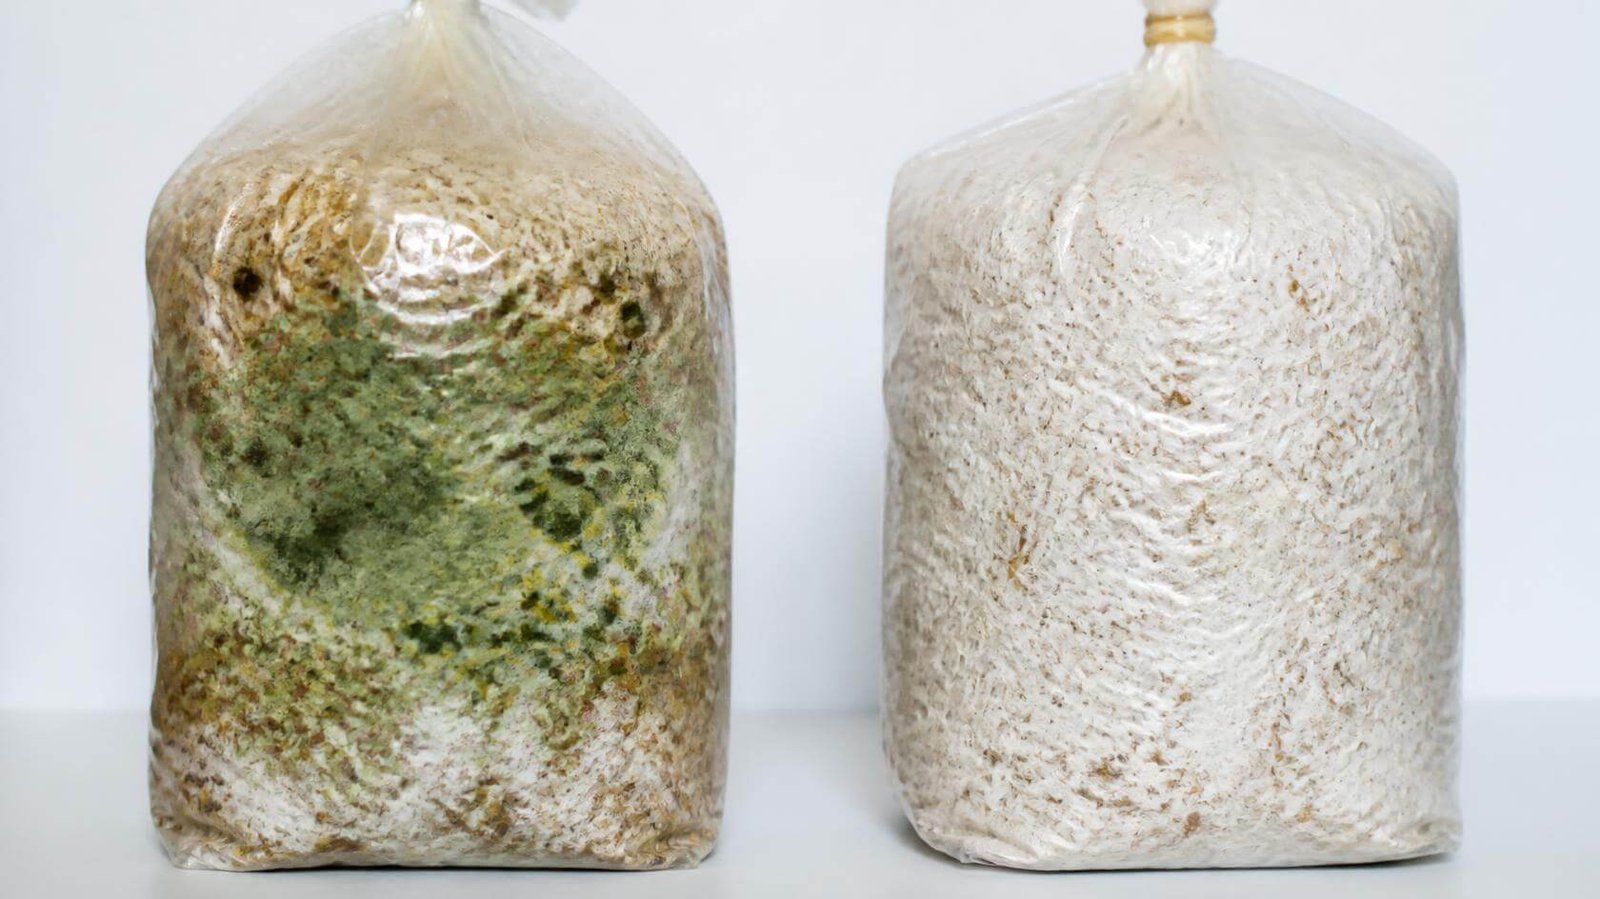
REAL TEST CASE — : In our own indoor test grows, we compared 100% coffee grounds against a 2:1 coffee-to-cardboard mixture. The 100% coffee ground batch developed green mold (Trichoderma) within 6 days because the grounds packed too tightly and lacked airflow. In contrast, the 2:1 cardboard-mixed batch colonized into a solid, healthy white block in just 14 days and produced three full flushes of pearl oysters. Adding cardboard is the single most effective way to eliminate mold for home growers.
Table of Contents
ToggleWhat Are Oyster Mushrooms?
If you want to learn how to grow oyster mushrooms, you will love that these soft, fan-shaped edible mushrooms grow in overlapping clusters. Recognized for their mild, savory, and slightly earthy flavor, they are a staple in home gourmet kitchens.
Most home growers start with pearl oyster, blue oyster, pink oyster, or golden oyster varieties. For this DIY method, standard oyster mushroom spawn—particularly pearl or blue oyster—delivers the most reliable results. You can explore more varieties in our detailed mushroom guides.
Is It Hard to Grow Oyster Mushrooms at Home?
If you want the simplest, most foolproof experience, start with a ready-made oyster mushroom grow kit. If you prefer a rewarding, low-cost DIY project, coffee grounds and cardboard work wonderfully when you practice basic cleanliness.
Why Use Coffee Grounds and Cardboard?
For beginners learning how to grow oyster mushrooms, coffee grounds and cardboard are free, accessible, and complement each other perfectly.
Using coffee grounds alone is a common beginner mistake—the grounds pack too tightly, trapping moisture and suffocating the mycelium, which often leads to green mold or sour odors. Cardboard balances the mix by allowing oxygen flow.
What You Need to Grow Oyster Mushrooms
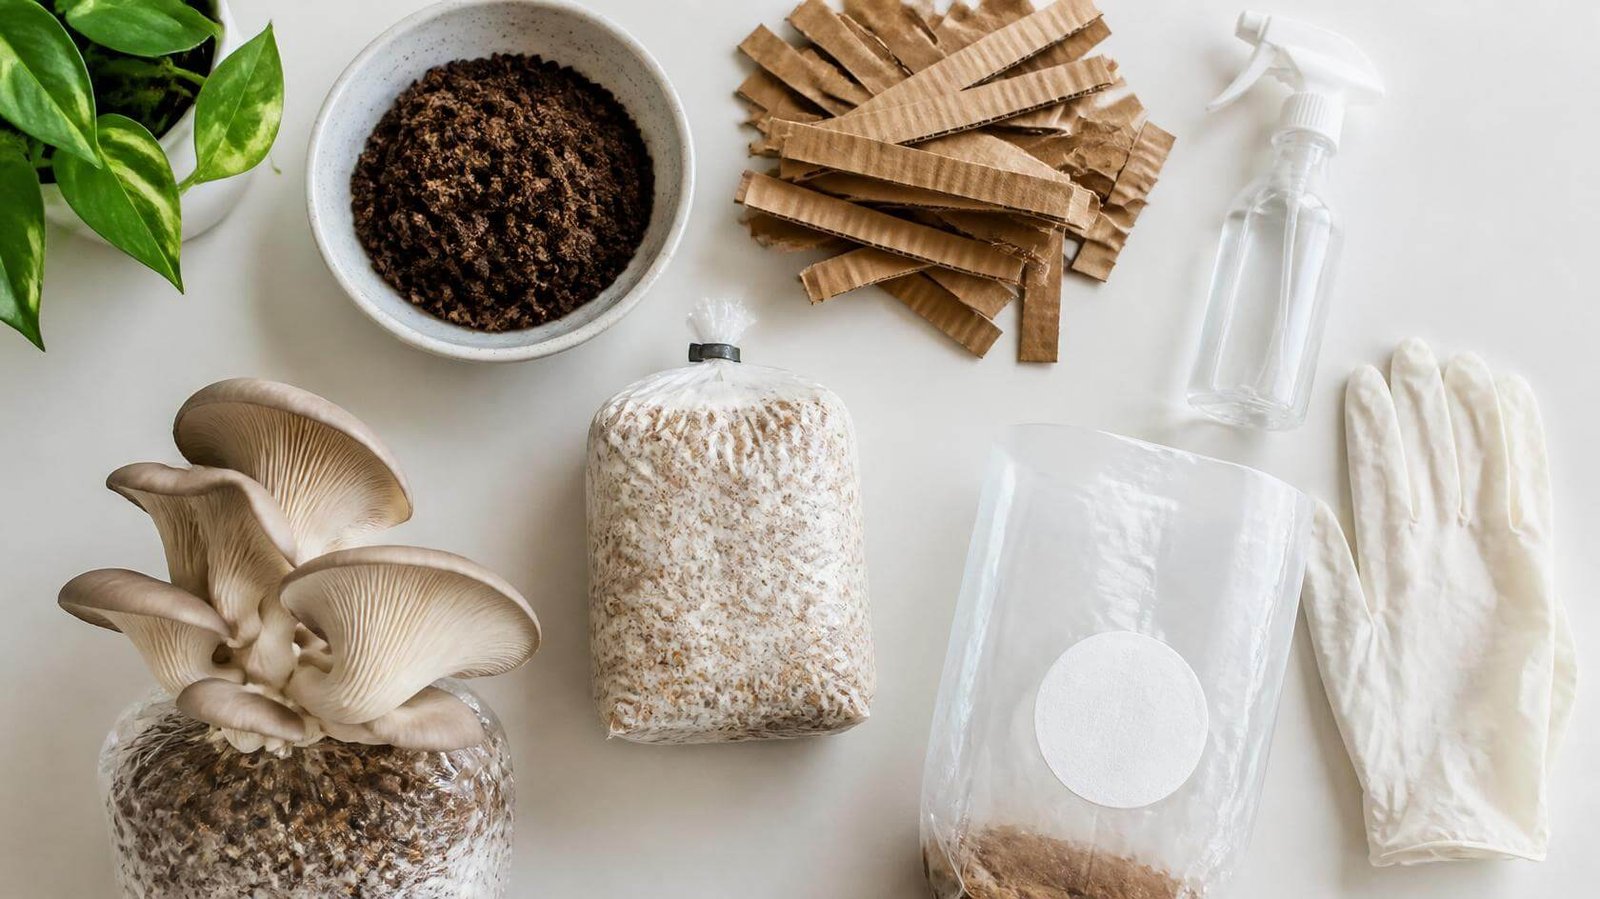
To learn how to grow oyster mushrooms safely at home, gather these basic household supplies before you begin:
- Fresh used coffee grounds (brewed within the last 24 hours)
- Plain brown cardboard (corrugated shipping boxes without wax)
- Clean filter-patch grow bag, food-safe plastic bucket, or container
- Fine-mist spray bottle filled with clean water
- Clean disposable gloves and scissors or utility knife
- 70% rubbing alcohol or hot soapy water for sanitizing surfaces
- Rubber band or bag clip
Need high-quality oyster mushroom spawn for your DIY grow? Get lab-tested, fast-colonizing grain spawn that resists mold.
SAFETY ALERT : Do not use glossy, printed, colored, or wax-coated cardboard. Inks and waxes can inhibit mycelial growth or introduce unwanted chemicals. Use plain, non-shiny brown cardboard boxes.
Best Conditions for Growing Oyster Mushrooms
- Incubation (Mycelium Growth) : Warm, dark place (typically 65–75°F / 18–24°C). No light is required while mycelium colonizes the substrate.
- Fruiting Stage : Indirect ambient light, high humidity (80–90%), and abundant fresh air exchange. Room temperatures around 60–70°F work best.
Different oyster species have slight temperature preferences. Blue oysters prefer slightly cooler rooms (60–65°F), whereas pink oysters enjoy warmer conditions (70–78°F). To learn more about environmental variables, read the University of Florida’s research on oyster mushroom cultivation basics.
How to Prepare Coffee Grounds Safely
Although brewing coffee sterilizes the grounds with hot water, they do not remain sterile once exposed to kitchen air. Mold spores land on damp grounds immediately. If left sitting for days, mold will outcompete your mushroom spawn.
- Use Grounds the Same Day : Use grounds within 24 hours of brewing. If collecting from a local cafe, ask for fresh morning grounds. Never use grounds that smell sour, fermented, or show fuzzy spots.
- Let Them Cool Completely : Never mix hot coffee grounds with mushroom spawn! Heat above 100°F (38°C) will kill the living mycelium. Allow grounds to cool completely to room temperature.
- Perform the Squeeze Test : Grounds should feel damp but not dripping. If you squeeze a handful and water drips out, they are too wet. Add dry cardboard strips to absorb excess water.
How to Prepare Cardboard
A vital step in how to grow oyster mushrooms is soaking your cardboard properly to create a clean, aerated substrate.
- Remove Tape and Labels — Peel away all packing tape, shipping labels,
stickers, and glossy coverings. - Tear Into Strips — Tear cardboard into small strips roughly 1–2 inches
wide (2.5–5 cm). Tearing by hand exposes rough corrugated fibers, which mycelium
loves to climb. - Soak in Hot Water — Submerge the cardboard strips in hot water for 30–
60 minutes. Hot water softens the fibers and helps reduce surface contaminants. - Drain Well — Squeeze out excess moisture thoroughly. The cardboard
must be damp like a wrung-out sponge—zero dripping water when squeezed.
How to Grow Oyster Mushrooms on Cardboard and Coffee Grounds
- Sanitize Your Workspace and Tools — Wipe down your work table, mixing
bowl, scissors, and hands with 70% rubbing alcohol or wash thoroughly with hot
soapy water. While clean home conditions are sufficient, sanitizing your tools gives
your mushroom spawn a decisive head start over mold spores.
- Mix Coffee Grounds and Cardboard — Understanding how to grow oyster mushrooms means getting your substrate moisture balance right from day one.
- 2 parts fresh used coffee grounds (e.g., 2 cups)
- 1 part soaked, well-drained brown cardboard (e.g., 1 cup)
Toss gently until the cardboard strips are evenly distributed through the coffee grounds, creating a loose, aerated structure.
- Inoculate with Oyster Mushroom Spawn — Add oyster mushroom spawn
at a rate of 10–20% of the total mix volume (e.g., about 1/2 cup of spawn for 3 cups
of substrate). Break up any spawn clumps with gloved hands and mix thoroughly so
mycelium can colonize every pocket of the substrate. Using a generous amount of
spawn (up to 20%) speeds up colonization, significantly reducing the window for mold
to grow.
- Pack Into a Grow Bag or Container — Transfer the mixture into a clean
plastic grow bag, glass jar, or food-safe bucket. Do not pack the mixture tightly—
leave it slightly loose so oxygen can circulate. Close the bag top with a rubber band or
clip. With a sanitized knife, make 4–6 small slits (about 1/2 inch) around the sides of
the bag for air exchange.
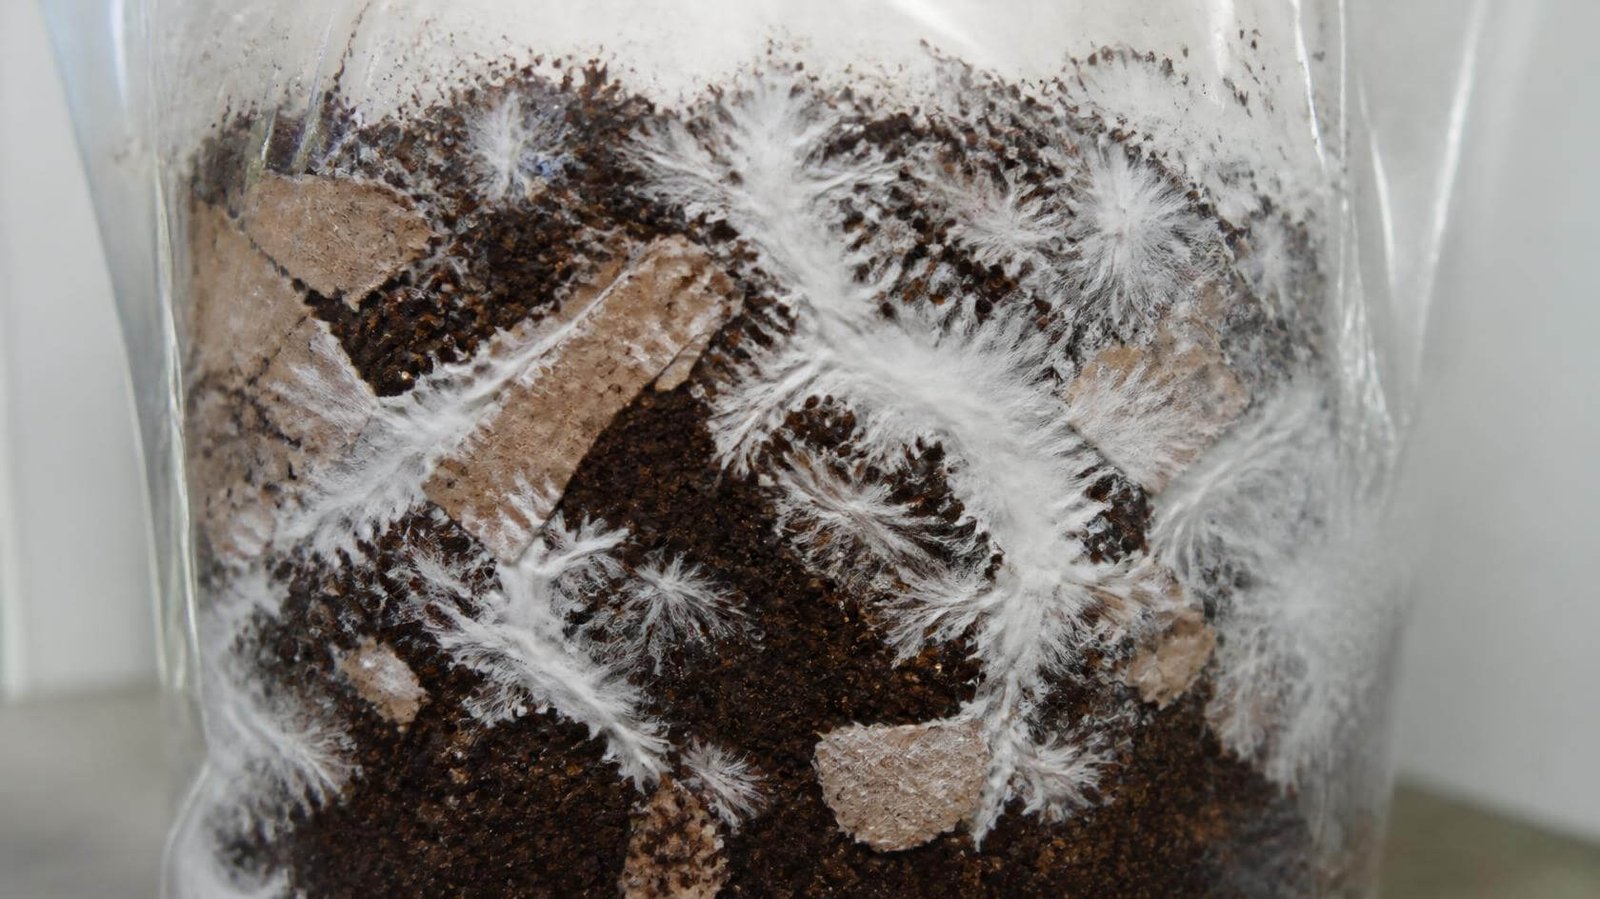
- Incubation (Let the Mycelium Grow) — During this critical stage of how to grow oyster mushrooms, keep your grow container in a warm, dark room between 65–75°F.
- Healthy Sign : Healthy oyster mycelium is bright white and has an earthy,
mushroom scent. - Warning Sign : Green, black, pink, or orange patches indicate mold
contamination. Do not attempt to salvage contaminated bags; discard them
immediately and restart.
Initiate Fruiting Conditions — Once the substrate block is fully white,
move it to a room with indirect ambient light and fresh airflow. Do not expose it to
direct sunlight, which will dry out the block. Mist the slits with clean water 2–3 times
daily to maintain humidity.
Exclusive Reader Discount - Save $10!
Apply Code: LEARNMUSHROOM
Want daily functional mushroom benefits without waiting for a harvest? Try Arctic Chaga’s Mushroom Starter Bundle — featuring Chaga Tea, Tincture & Mushroom Power 5.
This post contains affiliate links. We may earn a small commission at no extra cost to you.
How Long Do Oyster Mushrooms Take to Grow?
- Mycelium growth begins : 3–7 days after inoculation
- Full substrate colonization : 10–21 days (block turns fully white)
- First pins appear : 7–14 days after moving to fruiting conditions
- Mushrooms ready to harvest : 3–7 days after pins form
Growth rates depend on ambient room temperature and spawn ratio. Cooler temperatures slow down mycelium, while excessively wet substrates invite competing mold.
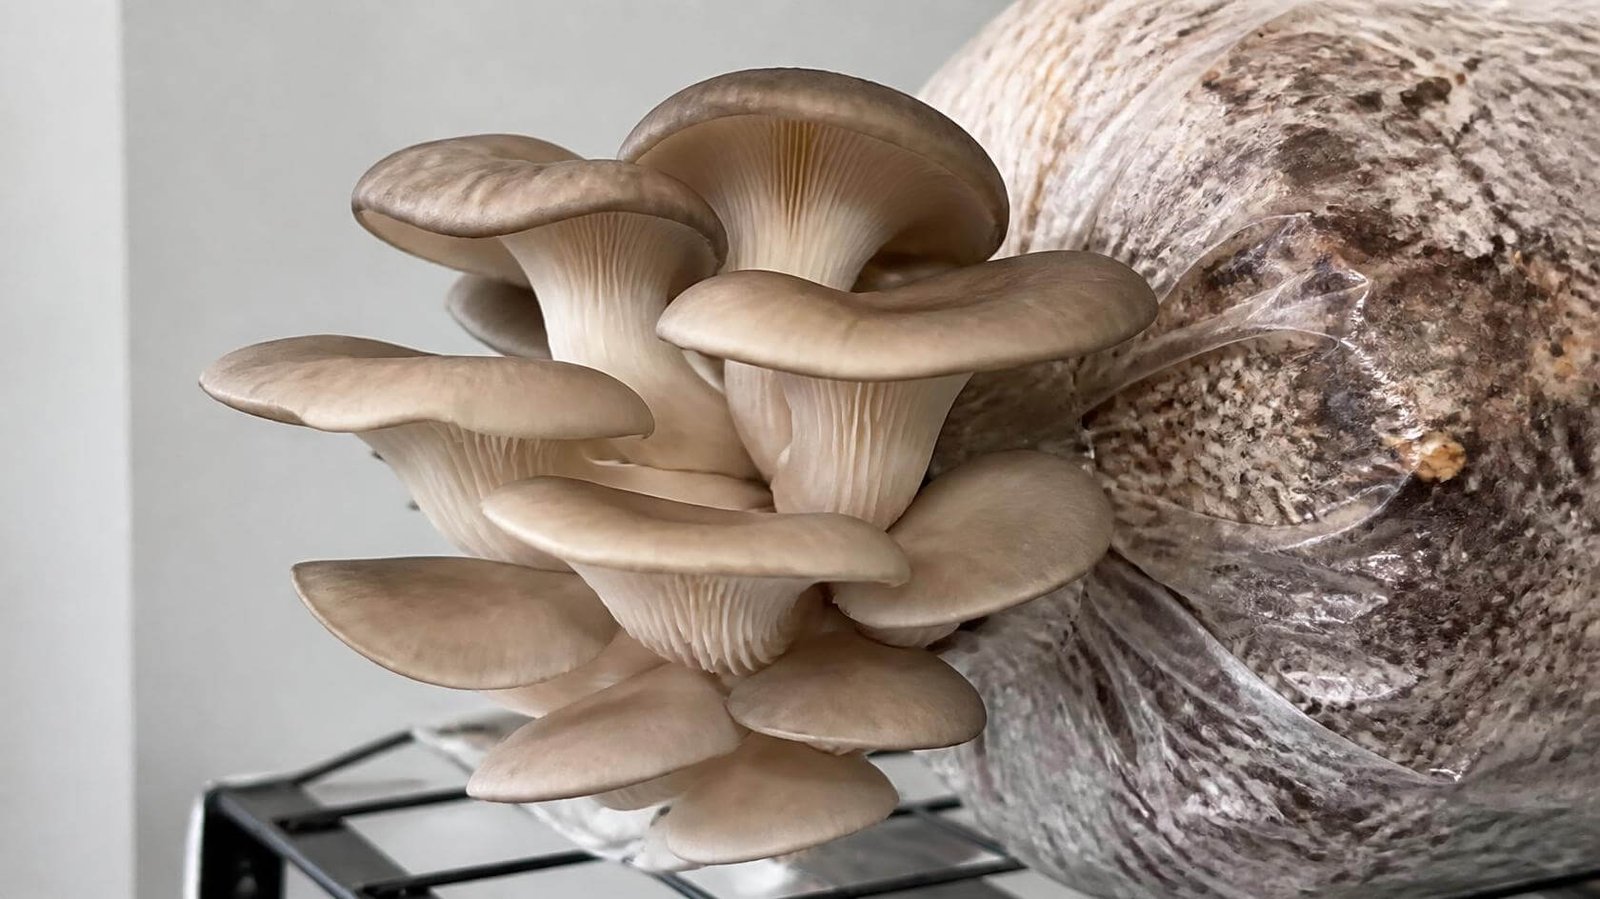
When to Pick Oyster Mushrooms
- The caps begin to flatten out
- The outer edges remain slightly curled downward
- The entire cluster looks full and firm
Do not wait until the cap edges curl upward or become wavy. Wavy, upturned caps indicate overripe mushrooms that have begun dropping spores, which toughens the texture and reduces flavor.
How to Harvest & Can You Get More Than One Harvest?
Can You Get a Second Harvest? Yes! Most home grow blocks can produce 2 to 3 flushes (harvest cycles). After harvesting your first flush:
- Carefully remove any remaining stem bits from the slits.
- Continue misting the block daily to maintain hydration.
- Maintain indirect light and fresh air.
- A second crop of pins typically appears within 1–2 weeks.
Common Beginner Problems and Fixes
- Green or Black Mold — Cause: Old coffee grounds (>24 hrs), unsterilized tools, or excess standing water. Fix: Discard contaminated blocks immediately—do not attempt to cut out mold. Next time, use fresher grounds, add more cardboard, and increase spawn ratio.
- Sour or Fermented Odor — Cause: Bacterial contamination from waterlogged substrate. Fix: Healthy oyster mycelium smells mild and earthy. A sour, trash-like odor means bacterial ferment. Discard and start over with a drier substrate mix.
- Mushrooms Shriveling or Drying Out — Cause: Indoor air is too dry or direct
sunlight is hitting the bag. Fix: Mist 3 times daily or drape a loose, perforated
plastic bag (humidity tent) over the grow bag to trap moisture while allowing air
exchange. - Long Stems and Tiny Caps — Cause: High carbon dioxide (CO2) buildup from insufficient ventilation. Fix: Oyster mushrooms need abundant oxygen. Open the humidity tent slightly, add more slits to the bag, or move to an area with better airflow.
- Fully White Block But No Pins — Cause: Lack of fruiting triggers (light, humidity, or oxygen). Fix: Ensure the block receives 10–12 hours of ambient room light, cut an ‘X’ shape into the plastic, and mist consistently.
- Substrate Too Wet or Dripping — Cause: Excessive moisture retention in
coffee grounds. Fix: Always blend in dry, shredded cardboard to soak up free water
before inoculating.
Coffee Grounds vs. Cardboard vs. Straw vs. Grow Kit
Not sure which growing medium is right for you? Compare the pros and cons of popular beginner substrates below:
|
Substrate
|
Best For
|
Difficulty
|
Mold Risk
|
Yield Potential
|
Beginner Rating
|
|---|---|---|---|---|---|
|
Coffee Grounds + Cardboard
|
Eco-friendly DIY test
|
Easy-Medium
|
Moderate
|
Medium
|
Great (Low Cost)
|
|
100% Coffee Grounds
|
Not recommended alone
|
Medium
|
High
|
Low-Medium
|
Poor (Molds Fast)
|
|
Pasteurized Wheat Straw
|
Traditional high-yield DIY
|
Medium
|
Low
|
High
|
Good (Needs Prep)
|
|
Hardwood Sawdust Pellets
|
Consistent gourmet yields
|
Medium
|
Low-Moderate
|
High
|
Good
|
|
Ready-to-Fruit Grow Kit
|
First-time home growers
|
Easiest
|
Very Low
|
High
|
Excellent (Best First Try)
|
Best Place to Grow Oyster Mushrooms at Home & Indoor Safety
- Kitchen counter (away from hot stoves and direct window sun)
- Pantry shelf or laundry room shelf
- Clean basement or heated garage shelf
- Dedicated indoor grow tent or fruiting chamber
Oyster mushrooms are safe to grow indoors, but individuals with asthma or mold allergies should harvest clusters before spore drop occurs. Discover more techniques for growing mushrooms at home safely in small spaces.
What Do Oyster Mushrooms Taste Like?
Oyster mushrooms have a mild, savory, and subtly earthy flavor with a velvety texture that turns wonderfully golden and crispy when sautéed. They pair exceptionally well with garlic, olive oil, soy sauce, butter, and fresh herbs.
Cooking breaks down chitin, unlocks savory flavors, improves nutritional absorption, and eliminates potential surface bacteria. Learn the best culinary methods in our guide on how to cook oyster mushrooms, and always follow USDA safe food handling tips when harvesting home crops.
Quick 12-Step Summary
- Collect fresh used coffee grounds brewed within the last 24 hours.
- Tear plain brown cardboard into strips roughly 1–2 inches wide.
- Soak cardboard strips in hot water for 30–60 minutes to soften and clean.
- Drain cardboard thoroughly until damp with zero dripping water.
- Sanitize your work table, mixing bowl, scissors, and hands.
- Mix 2 parts fresh coffee grounds with 1 part damp cardboard.
- Inoculate the mixture with 10–20% oyster mushroom spawn.
- Pack the inoculated mix loosely into a clean grow bag or container.
- Make 4–6 small slits or holes around the bag for oxygen exchange.
- Incubate in a warm, dark room (60–75°F) for 10–21 days until solid white.
- Move to indirect light and fresh air; mist slits 2–3 times daily.
- Harvest mushrooms when caps flatten but before outer edges curl upward.
Frequently Asked Questions
Q: How do you grow oyster mushrooms on cardboard and coffee grounds?
Q: Can you use decaf or flavored coffee grounds to grow mushrooms?
Q: How much coffee grounds do I need to grow oyster mushrooms?
Q:What is the best oyster mushroom variety for beginners?
Q: How long do oyster mushrooms take to grow?
Q: When should you pick oyster mushrooms?
Q: Why do oyster mushrooms smell sour or fishy?
Q: Is growing mushrooms in coffee grounds safe indoors?
Key Takeaways
- Learning how to grow oyster mushrooms is the easiest and most rewarding indoor cultivation project for beginners.
- Combining 2 parts coffee grounds with 1 part soaked cardboard creates the perfect moisture-to-airflow balance.
- Always use coffee grounds within 24 hours of brewing to prevent green mold contamination.
- Maintain dark, warm incubation (65–75°F) for 2–3 weeks, followed by indirect light and daily misting.
- Harvest full clusters when caps flatten but before edges curl upward for peak culinary texture.
- If you want the easiest, error-free first experience, start with a colonized beginner grow kit.
Final Thoughts
DISCLAIMER : This article is for general informational and educational purposes only and does not constitute medical or professional dietary advice. Always properly identify and cook cultivated mushrooms before consumption, and consult a physician if you have severe mold allergies.